Wednesday, March 30, 2011

Photographing Aigle


Aigle is a small village east of Montreux where you can find the Chateau d'Aigle and lots and lots of vineyards. This region is the producer of the Swiss Chablais wine. The chateau houses a museum on wine and wine making, which I did not have a chance to visit since I was there before they opened their doors. Yes, I went to photograph the Chateau with the Alps in the background and the vineyards in the foreground during sunrise.


The train ride from Lausanne is only 30 minutes. I changed to a funicular, aka street car, that took me to the stop of Aigle-Depot. This stop is where the trains are repaired, but it is also the back road to the castle where the vineyards are.


It was a very cloudy sunrise with not much colours in the sky, so I tried to capture to the best of my abilities the many different angles that the chateau can be photographed. I started from a distance still at the depot stop.


Image 1 - Chateau d'Aigle view from Aigle-Depot funicular stop


Then, I walked through the vineyards to a small rustic set of stairs where in my option is the best view of the chateau. In this location you can work with the lines of the vineyards to draw the eyes into the picture to the main subject, the Chateau d'Aigle.


Image 2 - Chateau d'Aigle view from rustic set of stairs in the middle of vineyards

Image 3 - Chateau d'Aigle view from rustic set of stairs in the middle of vineyards


For me, the horizontal format works better, but I still love both! I can only imagine how amazing this angle will look when the vines are all grown later in the summer. I have it marked down to go back there... and hopefully the sunrise will not disappoint either. 


But, I wasn't done yet, from the stairs, I arrived to the main road that takes you to the castle ("main" loosely used here since it is a very tiny two way street without sidewalks that I had to move out of the way whenever there was a car coming either direction!).
This is the view that most people take of the castle. There is a viewpoint area with some tourist information. 


Image 4 - Chateau d'Aigle view from viewpoint area


It is still a very interesting angle, but the side lines of the vineyard are for sure my favourite one. Later in the day, I tried a couple of views from the a mountain trail that I have climbed, but in this angle you cannot see the Alps in the background and there is too much distraction from the city behind. 


Image 5 - Chateau d'Aigle view from mountain trail


Before heading to the mountain trail, I got trigger happy with the abstracts that the area provides. The fields are all over the place and separated by lines of rock walls. Just have fun with lines and colours! 


Image 6 - Lines and colours from Aigle's vineyards

Image 7 - Lines and colours from Aigle's vineyards

Image 8 - Lines and colours from Aigle's vineyards

Image 9 - Lines and colours from Aigle's vineyards


It was while seeing all the lines and colours that I came across the secret of the Olympic Champions. They have their own wine reserve!!! J


Image 10 - Olympic Wine


To complete this shooting day, a train crossed the fields on the opposite mountain on a pretty beautiful composition. So, here is one more train picture to my new passion collection. I just wished the train colour was red or blue to jump out of the picture... but I guess photoshop can do miracles, right?


Image 11 - Train crossing Vineyards on the mountains


I do recommend the walk through the village. It is very small but beautifully preserved. Because I came from the back road, I did not have the impact on the arrival. So, if you are not planning a sunrise shot, just walk 20 minutes from Aigle's train station and get the experience of the village. 
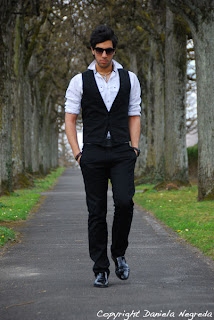
Photo Tip - What is the one thing that cannot miss from my camera bag?

Everyone has a favourite thing in their camera bag, some have that special lenses, others love their tripod. For me, the one thing that can never be missing from my camera bag is my pair of knee pads.


I know, it does not sound like a must have, but they really are important for me. A couple of years ago I was attending a workshop and in the instructions there was a suggestion of knee pads for close up shots. I laughed at it and decided to bring my volleyball ones underneath my pants. But they started to bug my legs after a while since they were tight and made it hard to stay for a long period of time on my knees. So I abandoned the idea.


Until the next spring came and while shopping at a Dollar Store I saw the gardening knee pads. I knew for the first minute that I saw them, that we would be BFF. lol


The gardening type is perfect for photographers. They are very light, they attach on top of the pants, and they have just a light elastic band with velcro that attach to the back of your knees. And the best of all, they protect not only your knees but also your pants! 


It might be because I am too tall, or just because I really love the low perspective for landscapes, but I found I am most of the time kneeling down to take images, many times even lying down on the ground. With the knee pads, my hiking pants do not have mud marks or tears on the knees and my own knees do not have scratches. It is a match made in heaven.
    

Sunday, March 27, 2011

The Look of Switzerland

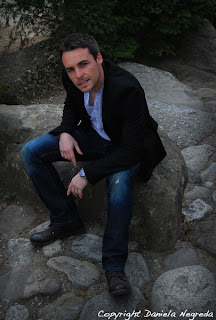
My friend Petra mentioned a couple of weeks ago that I should participate of a photo contest called The Look of Switzerland 2011. I took a look and it sounded pretty interesting, especially since you had to pre-apply as a photographer with the submission of your portfolio. Then, once approved you had to select a location for the shooting and wait for models to apply to it. The images had to be of how people look in Switzerland in the year 2011, with the main purpose of fashion.

I was one of the 800 photographers selected to registered this great fashion shooting weekend. All participating images had to be taken either on the 26 or 27th of March in the location indicated. The models had to be seen in full body. 

On the Saturday March 26th, I had 3 models participating on my shooting at the Vallee de la Jeunesse in Lausanne. It was a great practice for me, since I very rarely do model shooting. 
We had a fun and got some really nice pictures.


Thanks Farouk, Paola and Stephane for your participation, support and most of all your amazing look! 

Check out all the images from the weekend at the official site: http://www.thelookofswitzerland.ch/fr/pages/view/home

Friday, March 25, 2011

Photographing Vallorbe

One of the place that friends had mentioned when I first said about my photographing journey was Les Grottes de Vallorbe, a series of caves where the River Orbe is sourced - even thought it is not really the source of the river. J


So, on a Sunday morning when John had to study for a test, I got on my way there. It is less than 50 minutes on a direct train from Lausanne.


My first surprise was getting to the train station and discovering that there was no public transportation anywhere close to the Grottes. This is not very typical of Switzerland, you will find out that there is always a bus, a train, a cable car, or a street car that can take you to well known touristic places around the country.


I had still about two hours until the winter opening hour of the caves, so I decided to take a stroll around the village. I had forgotten that it was Sunday, and EVERYTHING is always close on Sundays, even on the bigger cities. For North Americans used to 24 hours service, it is definitely a cultural shock! Anyhow, it had been carnaval the day before and the streets were full of colourful confetti, pretty nice.


Then I got myself back in the trail in the direction of the Les Grottes. From the train station it is about 45 minutes walk, and it is not really all that incline, so everyone can do it without any problem.


When I arrived at the caves, I payed my entrance ticket and got my second surprise of the day, tripods were not allowed!


Well, how can you expect to get any good images in a cave without a tripod? 

I got in, an had a nice visit on the grottes. It is a very interesting site with plenty of stalactites, stalagmites, columns, draperies, underground rivers... all very beautiful, but also everything is artificial lighten. In summary, a very nice tourist place, but not a site for photographers!!!


Image 1 - Lac du Silence

Image 2 - Stalagmites

Image 3 - Lac Emerald

Image 4 - Medusa Draperies 
   
As you can see from the images, it is a nice to visit place, but with all the artificial light, it is not a photographer's dream, especially with so many natural beauties that the country offers.
I tried to capture some of the details on texture, but still with the low light and with a limited ISO camera, the result was not as expected. 


Image 5 - Texture detail

Once I have left  the Grottes, I decide to take a different hiking trail back to the station. I was in for one more surprise, and what a pleasant one! This trail was through the most intense green woods that I have ever been. For me, Vallorbe will be known for now on as the green place!
I went pretty crazy on the trail and it was hard for me to make a selection of my favourite shots... the following images had minimum processing, I just did some cropping here and there. The images are exactly as I remembered the trail: green, fresh, natural, and astonishingly beautiful! It has made up for the Les Grottes de Vallorbe for sure. 


Image 6 - Vallorbe - The Green Place

Image 7 - Small creek islands 

Image 8 - Detail of the intense fresh green

Image 9 - Small waterfalls surrounded by green

Image 10 - View of the Orbe River from the bridge

Image 11 - Side creeks running to meet the main river
Well, it was time to start seeing in full colours again. I continued on the trail until the train station. What a magnificent Sunday it turned out to be!!!

Thursday, March 24, 2011

A new passion


Nobody needs to worry, photography is still my passion. But within photography I have always enjoyed the most to photograph landscape, aka, non moving things! 


Lately thou, I am enchanted with something new. It might be because it is all over the place, or because it is up, down and through mountains. And the best of all, it does not depend on weather.


You have probably guessed by now, trains are my new passion since they are a trademark in all corners of Switzerland. They come in all colours and sizes. They roll through fields and vineyards. They pass close to monuments. They are in people's backyards. They take you in mountain inclines that seemed impossible. They never stop rain or shine. Sometimes they go slow, sometimes they go really fast. And, they are part of the scenery or better yet, they enhance the scenery.


Image 1 - Train through vineyards with Chateau du Cloitre in the background


So now, instead of just taking in the non-moving landscape, I have incorporated the moving trains in some images. Well, I should say that in more than just some. The other day I have noticed that in one morning I had shot three different trains scenes. It does not mean that all of images work well, but I keep trying to find the perfect composition to have my new passion in it. 


Be aware, there will be more and more images of trains in the future posts, or at least until I find a new passion to replace them. 

Photo Tip - How to include yourself in an image without running?

If you have been following my blog, you will have noticed that I am more and more including myself in photos. Sometimes just as a record shot, other times to give perspective or livelihood to the image.


Image 1 - Sunset at Vidy in Lausanne taken with remote control trigger


For the longest time I would set up the camera to the composition I wanted and using the timer on 20 seconds, I would press the shutter and run to the place that I had pre-thought for myself. Then, after 1 shot, I had to go back and repeat the process. 


Depending on the composition, 20 seconds might not be enough, or it might be dangerous for you to run back and forth, so I have started using a remote control. I never made the decision to buy one. But when I bought a battery pack from some e-bay site, the remote control came as part of the package. And it has proven to be a light and handy item to have around.


What I do now is to set up the camera in remote control with timer mode for 2 seconds. This allows me to press the shutter from a distance and still hide the remote control before the image is taken. 


For this sunset shot at Lake Geneva, the rocks were slippery and far from the camera, the remote control made it possible to achieve the result I had envisioned without risking getting hurt, after all I always place safety first. 


Another thing that I tend to do is to bracket 3 shoots in the camera just in case I am not 100% sure of the exposure. Remember, you are not in the shot yet when reading the exposure, this way you will avoid repeats. Oh, and don't forget to move around a couple of times. On the example above, I had first sat down on a rock further higher, only to realize that I was merging with the tree.

In any case, it is still trial and error. But at least, I don't have to run back and forth until the right image anymore! 

Monday, March 21, 2011

Photographing Gruyere

Gruyere, Oh yummy Gruyere!!!


I could not wait to visit Gruyere. Being one of my favourite cheese, I had to put this location early on my list of places to visit.

Image 1 - Gruyere Cheese Factory


The access is very easy from Lausanne, with a 15 minute train ride until Palezieux and then a "street car" ride through the real countryside of Switzerland. Oh, and you will know exactly the moment that you arrive in Gruyere, it is in the air! 


The Gruyere region has 4 main attractions: 
    1 - The medieval Chateau at the top of the village circulated by its walls
    2 - Gruyere cheese factory - La maison du Gruyere
    3 - The Chocolate factory - which is only open during the spring/ summer months 
    4 - The Lac Gruyere with its beautiful views of the valley and the Alps background


I have picked two out of the four attractions to focus during this day trip: the cheese factory and the Lac Gruyere. I will come back to indulge in chocolate and the Chateau in the near future.


I arrived early in the village and even though I was not focusing on the chateau, I did take the opportunity to walk outside the walls and appreciate the beauty of the region. During this walk I noticed the church and decided to stop by and make some interior shots.
Image 2 - Gruyere Church

Image 3 - Gruyere Church inside

Image 4 - Gruyere Church from the entrance


The sun was high up and there was enough light coming inside the church. The sun rays coming through the wonderful decorated stained glasses made for a nice abstract image.
Image 4 - Stained Glass abstract
 After the church I sat on a bench to eat a snack and just relax taking in all the views. My cellphone rang and I got the sad news about the earthquake and tsunami in Japan. It made me reflect and be even more thankful for the opportunities that I am having during this sabbatical. It definitely puts things into perspective. 


After a deep breath and recomposing myself, I climbed down the trail in the direction of the train station - I should mention that there are 2 ways to arrive at the medieval Gruyere village, one is a very steep short trail further left of the train tracks, and the other is a very steep long  trail right after you cross the train tracks. I recommend climbing up the short one and climbing down the long one, the only downfall from this plan is that the short one takes you to a side entrance to the village - The Maison du Gruyere where they have cheese production demo is just across from the train station. You can decide to start or end your visit in this location.


I did not take the full tour that they offer because I got mesmerized by the cheese display that they have right at the entrance of the site. 

Behind the glasses, it is cheese paradise!!!      


Image 5 - Maison du Gruyere - My personal cheese paradise! 

Wow! I was really going crazy with all the possibilities of photographing the piles and piles of Gruyere cheese.  In this display, the Maison du Gruyere shows you side by side the 2 different methods to cure the cheese. On the right side there is the machine that adds the salted water to the cheese, and on the left side the manual effort to do the same process. The exhibit changes according to the need of the cheese process - check out the time and more information on the official website. 
http://www.lamaisondugruyere.ch/


Image 6 - Automated cheese cure

Image 7 - Manual cheese cure
The main thing to pay attention when photographing at the front display of La Maison du Gruyere is for the glass reflection. Position your camera as close as possible to the glass, if you still have reflection as I had, use a cloth to cover it up. In my case, I used my body and my winter jacket to ensure that the glass was free of reflection. If you have someone else to help it might work better because the middle exhibit was impossible for just myself to cover up the full area.
Image 8 - Reflex free cheese storage unit
I think I have overstayed my time in front of the display because next thing I know the Fromagieur left the display and came to talk to me. After clarifying that I was not from any newspaper and the images were not going be sold, he invited me to check their traditional cheese storage unit in Charmey (about 15 minutes from Gruyere). HOORAY!!!


In Charmey, they had not only Gruyere cheese but also Vacherin d'Alpage. I could walk in the middle and touch all the cheeses. It was fantastic! This location was rustic with wooden ceiling and rock walls.

Image 9 - Trying to hold the 50kg (about 100lbs) Gruyere cheese


The space was much smaller not allowing for so many pictures, but it was totally worth the experience! Especially the tasting after the visit. Yummy! Yummy! Yummy!


Image 10 - La Maison du Gruyere in Charmey


Well, it was time to move on to the second part of my visit to Gruyere, the Lac Gruyere at sunset. I went back to the train station and took a train to Bulle, the largest nearby town. From there I had selected the location of Morlon on Google Earth to photograph the lake with some beach area in the foreground and the Alps in the background with the nice sunset light to complete. 


In small locations, trains and buses only run every hour, so you have to allow yourself enough time to move from one location to another if you are not driving. After waiting for some time, I caught the bus to Morlon, then I hiked down to Lake Gruyere. The close I was getting to the lake, the weirdest that it looked. Well, if you have read my posting about Google Earth, you already know what happend here... The lake was COMPLETELY dry!!! I have found out later that this is an artificial lake, so because of the mild winter and the absence of rain, the water has been used for other purposes. I did take some pictures while standing in the middle of the lake as a reminder to myself to ask around before making plans, especially when it involves steep hiking trails! 


Image 11 - Lac Gruyere dryness

Image 12 - Standing in the middle of what it was suppose to be Lac Gruyere

Image 13 - No sign of Lac Gruyere on this direction...
I climbed back to Morlon and I had some waiting time before the next bus back to Brulle. So, I just went inside of the local church. Quite charming! 


Image 14 - Morlon's Church


I made it back to Lausanne with my gear bag heavier... I had bought about half a kilo of the real Gruyere cheese!!! It was cheese bonanza day!


Photo Tip - Personal Safety

A concern that I have is my personal safety. There are so many things that can go wrong when you are photographing, especially if you are alone. If you are like me, you are probably looking to everything around you and forgetting to see where you step, or even worse - which is not my case - not paying attention to the turns that you are taking and can ended up lost.

The risks to personal safety range from a variety of factors such as people trying to steal the equipment, injuring yourself in the middle of nowhere, or even wildlife defensive behaviour.

The crack of dawn is an active time for wildlife as well as a difficult time to see your surroundings. So, if you are an early risers like me, pay extra attention to my 10 tips for personal safety when photographing alone.

1 - I always, and I can't stress it enough, ALWAYS, prepare an email with my plan of the day. For example what train I am getting, what stop I will take, where am I planning to go with approximate timing. I send it to my boyfriend even when I am photographing in a group. 


2 - I make sure that my cell phone is charged and at hand. I place it on my right jacket pocket or right pants pocket in the summer.


3 - I check periodically if I am at a location that has service for my cell. 


4 - I text my boyfriend in case plans change during the day - they often do. Currently, since I am photographing alone, I tend to check in every 4 hours with a quick text, so he can keep track of where I am going.


5 - I don't like to carry a bell, the constant noise takes away from the peace and quietness of many moments throughout the day. So when I am hiking a trail with possible wildlife I walk making lots of noise. I whistle or even talk to myself. I really cannot sing, otherwise it would be another effective way. Animals hide or run away when they notice human presence. What you want to avoid is to startled wildlife. This is the moment that they attack as a defensive behaviour. Now, if you are trying to photograph wildlife... disregard this tip and you are at your own risk. hehehe

6 - I used to carry a maze (pepper spray) which is very effective against people and animals, but it is tough traveling with it. Airports will make a big fuss if you have one with you. If you are just traveling locally, it might be a good option. But just make sure that if you have one you actually know how to operate it well and you keep it at hand.


7 - Have a flashlight! I carry on my bag a LED flashlight that is hand rechargeable. This way I don't even have to worry about the batteries. I also have a head light that attaches to a hat. This second headlight is very useful for being seen on high traffic areas (an heritage from my running days). Some people might prefer reflective gear.


8 - Talk to locals. A simple "Hi" when passing by can help you out on unpredictable situations. They are a wealthy source of information and tips when needed. They will be able to point out any hazard you might encounter or show an even better location. 

9 -  Stay safe! If I believe that the trails, the rocks or whatever the situation I am, is not safe, I do not proceed. Prevention is the best remedy. If the rock is too slippery, if the trail is too icy or the edge is way too close, I just stop myself. 

10 - Find other photographers to join you. I guess that's what I have been trying to do lately, luring friends and family to come and visit. 

Are you in?
Image1 - View of our apartment at sunset

Saturday, March 19, 2011

Photographying Chateau d'Oex


Chateau d’Oex is a charming small village in the Canton de Vaud that holds the world famous hot air balloon festival every last week of January. I was fortunate enough to be in Switzerland during the period and decided to check out the festival.

The village was bursting with ballooners and enthusiastic despite the biter cold Saturday morning. The sun was shinning in a cloudless sky. I arrived early to guarantee a good location to view all the action. I took advantage of the blue sky to photograph the chateau on top of the mountain.
Image 1 - Chateau d'Oex


The balloons started to inflate at the bottom of the hill. I got really excited. I couldn’t wait to see all the colourful balloons up in the air with the contrast of the blue sky and the Alps on the background. I position myself at the chateau on the top of hill and waited…
Image 2 - Hot Air Balloons getting ready for the Festival

A wind started blowing slowly and then gaining some more strength. The sky filled with clouds and the balloons deflated. Due to the weather condition the balloons would not be flying that day. 

I was heartbroken!      

Image 3 - Chateau d'Oex village

I went back down hill, sat down on an improvised food court for the festival and had a delicious vin chaud with friends. The day is never lost… I will just have to come back next January!!!

 You can check out more information about Chateau d’Oex and the Balloon Festival at the official site http://www.chateau-doex.ch/en/chateaudoex_en